Plant-by-Plant Care
How to Care for a Peace Lily Plant
How to care for a peace lily: light, the famous droop-and-recover watering, humidity and brown tips, reblooming, feeding, repotting, and toxicity.
Disclosure: The Plant Pages is reader-supported. Some pages include ads and affiliate links, and we may earn a commission from qualifying purchases, at no extra cost to you.
If your peace lily flopped over dramatically and you panicked, you’ve met its most famous quirk: it tells you loudly when it’s thirsty, then springs back within hours of a drink. Quick answer: care for a peace lily (Spathiphyllum) by giving it medium to low indirect light, watering when the top inch of soil dries, keeping average to high humidity, and feeding lightly in spring and summer. It’s one of the most forgiving houseplants for a beginner, with one caution: it’s mildly toxic if chewed by pets or people. Below I’ll walk through exactly how to care for a peace lily plant, step by step, including how to coax out those elegant white blooms.
Peace lily care at a glance
Here’s the whole routine in one table. The sections below explain the why behind each line.
| Need | What the peace lily wants |
|---|---|
| Light | Medium to low indirect light; bright indirect to flower |
| Water | When the top inch of soil is dry |
| Soil | Loose, well-draining, peat or coir based mix |
| Humidity | Average to high (ideally 50% or more) |
| Temperature | 65 to 80°F (18 to 27°C), no cold drafts |
| Feeding | Diluted houseplant fertilizer, spring and summer |
| Pot | Drainage holes, snug rather than huge |
| Repotting | Every 1 to 2 years, or when rootbound |
Light: one of the best low-light plants, with a catch
Peace lilies grow as understory plants on tropical forest floors, where light arrives soft and filtered through the canopy above. That heritage makes them genuinely tolerant of low light, which is why they’re a go-to for offices and dim corners where most plants sulk. A spot near a north-facing window, or a few feet back from an east-facing one, suits them well.
Here’s the catch, and it’s the single thing most people get wrong: low light keeps a peace lily alive, but it won’t make it bloom. Those white flowers need brighter, indirect light to form. If your plant has glossy green leaves but never flowers, dim light is the usual reason. Move it somewhere brighter, still out of direct sun, and you’ll often see flower spikes appear within a few weeks to a couple of months.
What peace lilies don’t tolerate is direct sun on the leaves. A few hours of harsh midday rays can scorch and yellow the foliage, leaving pale or crispy patches. If your brightest window gets intense afternoon sun, set the plant back a few feet or filter the light with a sheer curtain. Rotate the pot a quarter turn each week so the leaves grow evenly rather than all leaning toward the glass.
Watering: the famous droop, and why not to wait for it
If you remember one thing about how to care for a peace lily plant, make it this. The peace lily is the drama queen of houseplants: when the soil dries out, the whole plant wilts and collapses, leaves drooping toward the pot rim. Give it a thorough drink and it perks back up, often within a few hours, looking as if nothing happened. It’s a remarkably clear signal, and it’s why peace lilies forgive forgetful waterers.
The reliable method:
- Feel the soil. Push a finger in to the first knuckle, about an inch down.
- If it’s dry at that depth, water thoroughly until it runs from the drainage holes.
- If it still feels damp, wait and check again in a day or two.
- Always empty the saucer so the pot never sits in standing water.
Indoors this usually works out to about once a week, but light, pot size, and season all shift the timing, so check the soil rather than watering on a fixed schedule. In the dim, slow months of winter the plant drinks less, so stretch the interval and confirm by feel.
Now the important part: tempting as it is to let the plant tell you when to water, don’t lean on that wilt every single time. Each time a peace lily collapses, its fine feeder roots dry out and some die back. Do this repeatedly and you’ll see browning leaf tips and slower growth, even though the plant keeps “recovering.” The wilt is a useful backstop if you forget, not a watering schedule. Aim to water before the dramatic flop, when the top inch is dry but the plant is still upright.
There’s a flip side worth flagging. Peace lilies hate sitting in soggy soil just as much as they hate going bone dry. Constantly wet roots can’t breathe and start to rot, and a rotting plant droops too, in a way that looks exactly like thirst. So a peace lily that wilts right after watering, with damp soil, is usually overwatered, not under. More on that in the problems section.
Humidity, brown leaf tips, and your tap water
Peace lilies are tropical plants, and they appreciate higher humidity than most homes offer, ideally around 50% or more. In a dry room, especially in winter with the heating running, the leaf tips often turn brown and crispy. That browning is the most common cosmetic complaint with this plant, so it’s worth understanding the causes, because there are several.
Low humidity is one driver. A pebble tray under the pot or a small humidifier nearby genuinely helps; grouping plants together also nudges the local humidity up. Misting, on the other hand, is mostly a feel-good ritual: the moisture evaporates in minutes and does little for ambient humidity, and leaves left wet can develop fungal spots.
Inconsistent watering is another driver. Swinging between bone-dry and soaked stresses the leaf edges and browns them, which is one more reason to water before the plant collapses rather than after.
The cause people overlook is the water itself. Peace lilies are sensitive to the chlorine and fluoride found in much municipal tap water, and these can accumulate in the soil and burn the leaf tips over time. Letting tap water sit out overnight drives off chlorine, but fluoride doesn’t evaporate, so if your water is fluoridated you’ll want filtered, distilled, or collected rainwater for this particular plant. Over-fertilizing adds to the same problem by leaving salts behind, so go easy on feeding too.
One reassuring note: a few brown tips don’t harm the plant’s health, they’re just unsightly. You can snip them off with clean scissors, trimming to follow the natural leaf shape, and then fix the underlying cause so new growth comes in clean.
The white “flower” explained, and how to encourage reblooming
That elegant white “bloom” isn’t really a flower in the way a rose is. What you’re looking at is a spathe, a modified leaf that acts like a hood, and the spadix, the small upright spike it wraps around. The tiny true flowers are the bumps clustered along the spadix; the showy white spathe is there to attract pollinators. It usually opens pure white, then ages to pale green and finally browns as it fades, which is normal and not a sign of trouble.
When a spathe finishes and turns green or brown, cut its stalk all the way down to the base with clean scissors rather than leaving a stub. This tidies the plant and directs energy back into new growth.
Getting a peace lily to rebloom comes down to a few things:
- Enough light. This is the big one. Bright, indirect light is what triggers flowering; a plant in deep shade stays green and leafless of blooms indefinitely.
- A mature, established plant. Very young plants and freshly divided ones often skip flowering for a season while they build up. Patience usually solves this.
- Steady care. A plant that isn’t fighting thirst, drafts, or salt buildup has the spare energy to flower.
You may have heard that florists use a hormone called gibberellic acid to force greenhouse peace lilies into uniform bloom. That’s a commercial trick, not something to attempt at home; the reliable home route to flowers is simply more light and a healthy, settled plant.
Fertilizing: light and seasonal
Peace lilies aren’t heavy feeders. During the active growing season in spring and summer, feed with a balanced liquid houseplant fertilizer diluted to about half the label strength, roughly every six weeks or so. Ease off in fall and stop in winter when growth naturally slows.
Less is more here. Over-fertilizing builds up salts that burn the roots and brown the leaf margins, which is exactly the symptom you’re trying to avoid. If you ever see a white crust on the soil surface, flush the pot with plain water to rinse the excess through.
Two small habits make feeding safer. Never fertilize bone-dry soil; feed right after a normal watering so the diluted solution spreads evenly instead of concentrating against dry roots. And skip feeding a plant that’s clearly stressed, newly repotted, or sitting in cold, low-light winter conditions. Fertilizer is for a plant that’s actively growing, not a tonic for a struggling one.
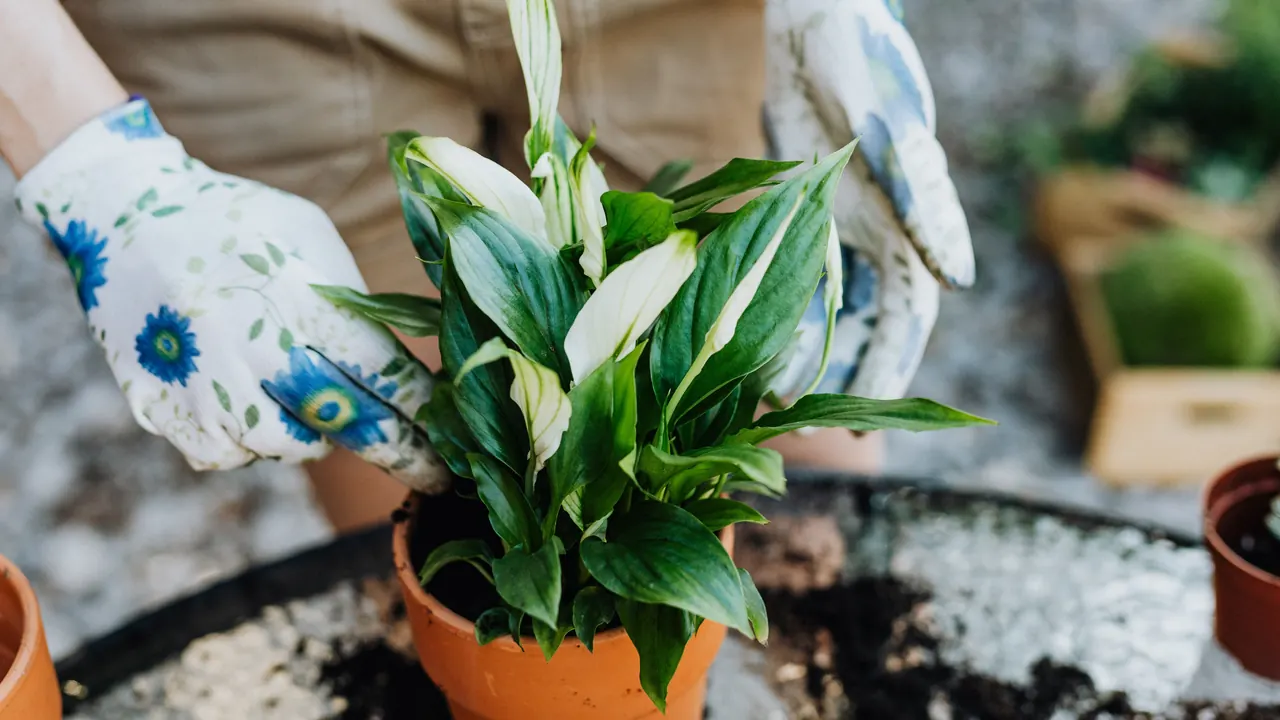
Repotting: when and how
Peace lilies grow into dense clumps and tend to fill their pots faster than many houseplants, so plan on repotting every one to two years. Signs it has outgrown its container include roots circling the surface or poking out the drainage holes, water running straight through without soaking in, soil that dries within a day or two, and a plant that wilts again almost as soon as you’ve watered it because there’s more root than soil left to hold moisture.
When it’s time, repot in spring and move up just one pot size, an inch or two wider, with drainage holes. Refresh a loose, well-draining mix; a standard peat- or coir-based houseplant potting mix works well. Ease the root ball out, gently loosen any tightly circling roots, and trim away anything dark, mushy, or foul-smelling, which is rot you want gone before it spreads. Set the plant at the same depth it grew before.
Repotting is also the natural moment to divide an overgrown peace lily if you’d like more plants. A mature clump separates into sections, each with its own roots and a few leaves; pot each piece up on its own and keep them a touch warmer and shadier than usual while they settle. After repotting or dividing, water once to settle the soil, then hold off on fertilizer for about a month while new roots establish. Some droop or a couple of yellowing leaves in the following week is normal adjustment, not a sign you did something wrong.
Common problems and quick fixes
Most peace lily troubles trace back to watering, light, or water quality, and reading the symptom tells you which one. Here’s how to diagnose the usual complaints.
Yellowing leaves. A single old lower leaf yellowing now and then is just normal aging; pull or trim it off. When several leaves yellow at once, especially with soggy soil, suspect overwatering and the beginnings of root rot. Let the soil dry further between drinks and confirm the pot drains freely. Widespread yellowing on a plant that’s been bone dry for a while can instead mean chronic underwatering, so check which extreme you’re at by feeling the soil.
Brown, crispy tips. As covered above, the usual suspects are low humidity, inconsistent watering, over-fertilizing, and chlorine or fluoride in tap water. Steady your watering, raise humidity a little, ease off the feed, and switch to filtered, distilled, or rainwater if your tap is heavily treated. Trim the brown tips for looks once you’ve addressed the cause.
No flowers. Almost always too little light. Peace lilies are sold as low-light plants, and they are, but low light and flowering don’t go together. Move the plant somewhere brighter but still out of direct sun, and give a young or recently divided plant a season to mature before you worry.
Drooping even when watered. This is the tricky one, because both thirst and rot look like a flop. If the soil is dry and the plant recovers within hours of watering, that was simple thirst. If the soil is wet and the plant stays collapsed, you’re likely looking at root rot from overwatering. Slide the plant out and check the roots: firm and pale is healthy, while brown, soft, and sour-smelling is rot. Trim away the rotted roots, repot into fresh well-draining mix, and water more sparingly from then on.
Tiny black flies in the soil. Those are fungus gnats, which thrive in chronically damp topsoil, another nudge to let the surface dry between waterings. Yellow sticky traps and a BTI product such as mosquito bits will clear them; here’s our full walkthrough on how to deal with fungus gnats.
For a deeper reference on this genus and its growing conditions, the Missouri Botanical Garden’s plant finder entry for Spathiphyllum is a reliable, citation-worthy source.
Toxicity: mild but real for pets and kids
Peace lilies are mildly toxic, and it’s worth being clear about exactly how, because the name causes confusion. The plant contains insoluble calcium oxalate crystals throughout its leaves and stems. When a curious pet or child chews on it, those needle-like crystals irritate the mouth, throat, and stomach, causing drooling, pawing at the mouth, oral pain, and sometimes vomiting. It’s unpleasant and worth a call to your vet or doctor, but it’s not usually life-threatening.
One important clarification: despite the name, a peace lily is not a “true lily.” True lilies in the genus Lilium and daylilies in Hemerocallis can cause fatal kidney failure in cats even from tiny exposures, and that severe toxicity does not apply to the peace lily. Still, the safest move is simply to keep the plant up out of reach of pets and small children who like to nibble, and to wash your hands after handling cut stems, since the sap can irritate skin.
Cleaning the leaves
Peace lily leaves are broad and glossy, which means they collect dust, and a dusty leaf photosynthesizes less efficiently. Every few weeks, wipe each leaf gently with a soft, damp cloth, supporting it from underneath with your other hand so you don’t crease or snap it. Plain water is all you need; skip the commercial leaf-shine sprays, which can clog the leaf pores and do more harm than good. An occasional lukewarm shower in the sink or tub rinses the whole plant and the topsoil at once, which pets and dust both appreciate.
Signs you’re getting it right
You’ll know your routine is working when you see firm, upright, deep-green leaves with a healthy shine, new growth pushing up from the center, and, given enough light, fresh white spathes appearing in spring and summer. The plant should stay upright between waterings rather than collapsing every few days, which tells you you’re watering before thirst rather than after.
If you’re enjoying how undemanding the peace lily is and want another easygoing plant to grow alongside it, two good companions are the Swiss cheese plant, in our monstera care guide and the braided money tree, both beginner-friendly and happy in similar bright, indirect light.
The bottom line: give your peace lily medium to bright indirect light, water when the top inch dries rather than waiting for the dramatic droop, keep humidity up and use gentler water if your tap is heavily treated, feed lightly in the warm months, and keep it away from nibbling pets and kids. Get the watering rhythm right and the rest is easy.