Plant-by-Plant Care
How to Care for a Monstera Plant: A Beginner's Guide
How to care for a monstera plant: light, watering, chunky aroid soil, humidity, a moss pole, feeding, and fixes for yellowing leaves and missing splits.
Disclosure: The Plant Pages is reader-supported. Some pages include ads and affiliate links, and we may earn a commission from qualifying purchases, at no extra cost to you.
The monstera has become the houseplant everyone wants, and the good news is that it’s far easier to please than its dramatic leaves suggest. Quick answer: care for a monstera (Monstera deliciosa) by giving it bright indirect light, watering only when the top 2 inches of soil are dry, planting it in a chunky, well-draining aroid mix, keeping moderate humidity, and giving it a moss pole to climb for support and bigger leaves. It’s toxic to pets, so place it thoughtfully. Get the watering and light right and your monstera will keep pushing out larger, more split leaves season after season. Below I’ll walk through exactly how to care for a monstera plant, step by step.
Monstera care at a glance
Here’s the whole routine in one table. The sections below explain the why behind each line.
| Need | What the monstera wants |
|---|---|
| Light | Bright, indirect light most of the day |
| Water | When top 2 inches of soil are dry |
| Soil | Chunky, well-draining aroid mix |
| Humidity | Moderate to high (50 to 60%) |
| Temperature | 65 to 85°F (18 to 29°C), no cold drafts |
| Feeding | Diluted houseplant fertilizer, spring and summer |
| Support | A moss pole or trellis to climb |
| Repotting | Every 1 to 2 years |
Light: bright but indirect
In the wild, a monstera starts life on the rainforest floor and climbs toward the canopy, so it’s adapted to dappled, filtered light rather than blazing sun. Indoors, the sweet spot is a bright room near an east-facing window, or a south- or west-facing one with the plant set a few feet back or behind a sheer curtain. A little gentle morning sun is welcome.
What a monstera doesn’t want is hours of harsh, direct midday sun, which can bleach and scorch the leaves and leave pale, sunburned patches. It also dislikes deep shade. In a dim corner the new leaves come out smaller, the gaps between them stretch, and the famous splits often fail to develop at all.
A quick test: if you can read comfortably in that spot during the day without switching on a lamp, there’s likely enough light. Rotate the pot a quarter turn each week so the plant grows evenly instead of leaning hard toward the glass, since monsteras lunge toward their light source.
If your only bright window faces south or west and pours in strong afternoon sun, a sheer curtain diffuses the harshest rays without starving the plant. North-facing rooms and windowless interiors are usually too dim for steady growth and good fenestration. In those spots a basic LED grow light on a timer for 10 to 12 hours a day keeps the plant compact and the new leaves full-sized rather than small and sparse. If a low-light room is your only option, you may be happier with a peace lily, which actually tolerates lower light, than fighting to give a monstera the brightness it craves.
Watering: the part that matters most
If you remember one thing about how to care for a monstera plant, make it this. A potted monstera is far more likely to die from too much water than too little. Constantly soggy soil suffocates the roots and invites root rot, the same quiet killer that takes down so many beginner plants.
The reliable method:
- Feel the soil. Push a finger in to the second knuckle, roughly 2 inches down.
- If it’s dry at that depth, water thoroughly until it runs from the drainage holes.
- If it still feels damp, wait and check again in a few days.
- Always empty the saucer so the pot never sits in standing water.
Indoors this usually works out to about once a week in summer and every 10 to 14 days in winter, but the calendar is a guide, not a rule. Light, pot size, humidity, and season all shift the timing, so check the soil rather than watering on a fixed day. If judging moisture by feel makes you nervous, an inexpensive moisture meter takes out the guesswork.
The classic overwatering signs are yellowing leaves (often several at once), mushy stems, and a sour smell from the soil. Underwatering instead shows up as drooping leaves and crispy brown edges over bone-dry soil. When in doubt, lean toward underwatering, since a monstera bounces back from a missed drink far more easily than from waterlogged roots. This is the same overwatering trap that catches owners of other forgiving favorites like the money tree, where soggy soil is the number-one killer.
Soil and pots: drainage is everything
Because overwatering is the main risk, your soil and pot do half the work of keeping a monstera healthy. As an aroid, a monstera wants a chunky, airy mix that drains fast and lets oxygen reach the roots, not a dense, water-holding soil that stays wet for days.
A reliable recipe is roughly equal parts standard potting mix, orchid bark, and perlite, with a handful of coco coir or worm castings for a little moisture retention and nutrition. The bark is the key ingredient. It creates pockets of air that mimic the loose, leafy debris these plants root into in the wild. Bagged “aroid mixes” sold for monsteras and philodendrons are built on the same idea if you’d rather not blend your own.
Choose a pot with drainage holes, no exceptions. A decorative cachepot is fine as long as the plant lives in a plastic nursery pot inside it that you can lift out to drain. Avoid jumping to a huge container, which holds a large volume of wet soil the roots can’t use and stays soggy. Pot up just one size at a time.
Humidity, temperature, and whether to mist
Monsteras are tropical and enjoy moderate to high humidity, ideally around 50 to 60%. Most homes sit a bit below that, and a monstera will still grow happily, but in very dry air, especially in winter with the heat running, the leaf edges may brown and new leaves can struggle to unfurl cleanly.
A word on misting, since it gets recommended constantly: it’s largely a feel-good ritual. The moisture evaporates within minutes and does almost nothing for ambient humidity, and leaves left wet can develop fungal spots. If your air is genuinely dry, a pebble tray under the pot, grouping plants together, or a small humidifier nearby does far more real good.
On temperature, keep it between 65 and 85°F (18 to 29°C) and away from cold window panes, exterior doors, and the dry blast of heating or AC vents. Monsteras have no tolerance for frost, so a chilly draft or a cold night against the glass can stall growth or trigger leaf damage.
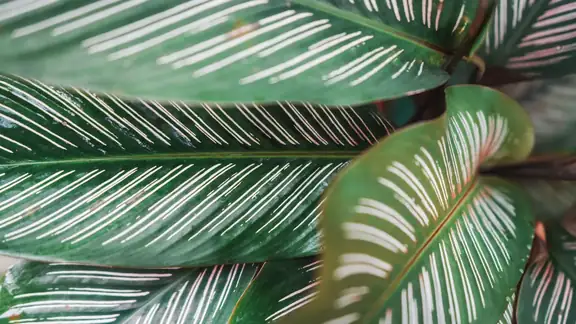
The famous splits: why leaves fenestrate and how to encourage it
The holes and splits that make a monstera so recognizable have a name: fenestration. There are two patterns worth knowing. The deep cuts that reach in from the leaf edge are the “splits,” and the closed oval windows in the middle of the leaf are the true fenestrations. Both develop as the plant matures.
The leading theory for why monsteras evolved these gaps is that they let light pass through the upper leaves to reach the lower ones, and let wind and heavy rain through without tearing the leaf. Whatever the exact reason, the practical takeaway for you is simple: fenestration is a sign of a maturing, well-lit, well-supported plant.
If your monstera is putting out solid, heart-shaped leaves with no holes, that’s almost always one of two things:
- It’s still young. Juvenile monsteras produce simple, entire leaves first. Splits arrive as the plant ages and each new leaf grows larger than the last. You can’t rush biology here. Keep it healthy and the fenestration comes.
- It needs more light. This is the single biggest lever you control. A monstera in dim light will keep making small, solid leaves indefinitely. Move it somewhere brighter (still indirect) and the next leaves often emerge noticeably more cut.
Giving the plant something to climb also helps, which leads neatly into the next section.
Support and a moss pole
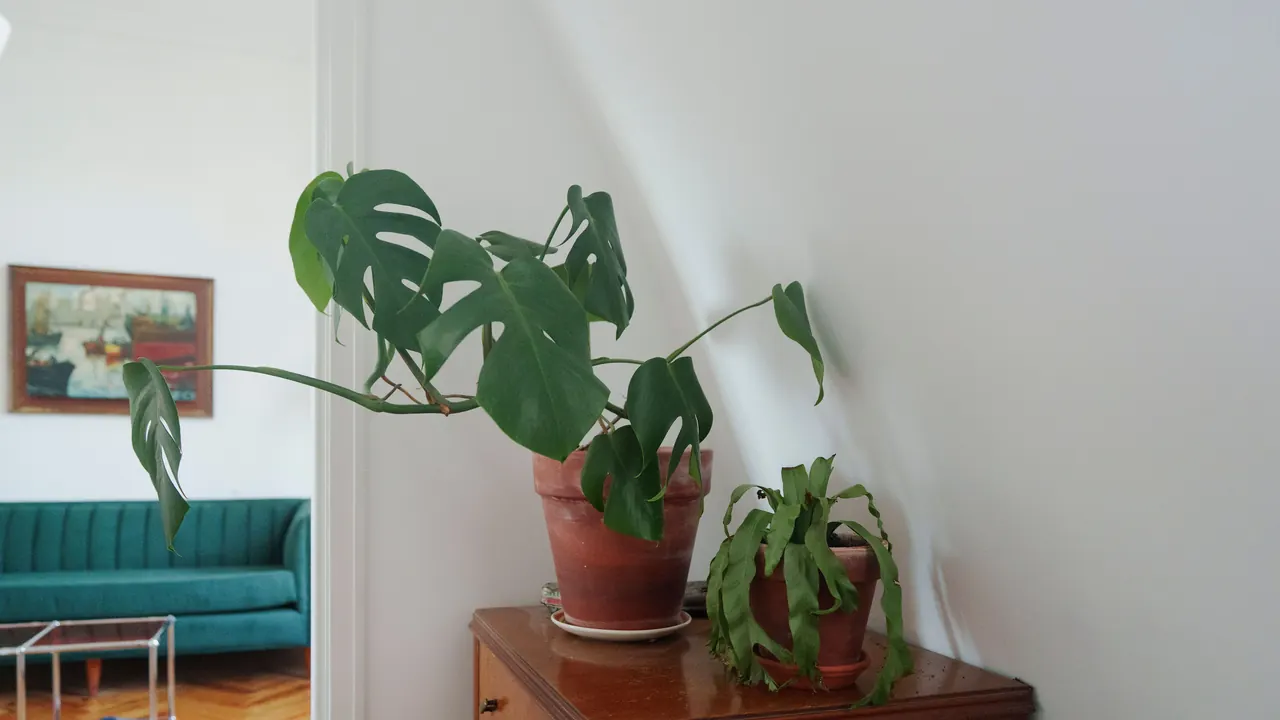
Monsteras are climbers, not free-standing shrubs. In the rainforest they scramble up tree trunks, gripping the bark with thick aerial roots, and that upward climb is tied to producing their biggest, most fenestrated leaves. A monstera left to sprawl across the floor tends to put out smaller, floppier leaves and quickly looks messy.
A moss pole (or a coir pole, a wooden trellis, or a plank) gives those aerial roots something to attach to and the plant a vertical path to follow. As you guide the stem up and pin it to the support, the plant reads “I’m climbing” and rewards you with larger leaves over time. Keep a sphagnum moss pole lightly damp and the aerial roots will often grow right into it.
A few practical tips:
- Add the pole early. It’s far easier to train a young plant onto a pole than to wrangle a sprawling adult onto one later.
- Secure the stem loosely. Use soft plant ties or velcro strips to hold the stem against the pole without cutting into it. Re-tie as it grows.
- Don’t cut off aerial roots. They look unruly, but they’re how the plant anchors and drinks. Tuck them toward the pole or the soil instead of trimming them.
Feeding: light and seasonal
Monsteras grow vigorously when they’re happy, so they appreciate regular feeding during the growing season, but the usual mistake is overdoing it. During spring and summer, feed with a balanced liquid houseplant fertilizer diluted to about half the label strength, roughly once a month. Ease off in fall and stop in winter when growth naturally slows.
Less is more. Over-fertilizing builds up salts that burn the roots and brown the leaf margins. If you ever see a white crust on the soil surface, flush the pot with plain water to rinse the excess through.
Two small habits make feeding safer. Never fertilize bone-dry soil. Feed right after a normal watering so the diluted solution spreads evenly instead of concentrating against dry roots. And skip feeding a plant that’s clearly stressed, newly repotted, or sitting in cold, low-light winter conditions. Fertilizer is for a plant that’s actively growing, not a pick-me-up for a struggling one.
Common problems and quick fixes
Most monstera troubles trace back to watering, light, or air, and reading the symptom tells you which one. Here’s how to diagnose the usual complaints.
Yellowing leaves. Overwatering is the most common cause by far, especially when several leaves yellow at once and the soil stays wet for days. Soggy roots can’t take up oxygen, and yellowing is the early warning before rot sets in. Let the soil dry further between drinks, confirm the pot drains freely, and check the roots for softness or a sour smell. Occasional yellowing of a single old lower leaf, by contrast, is just normal aging.
Brown, crispy edges. Dry air is the classic culprit, especially in winter heat, and inconsistent watering that swings between bone-dry and soaked browns the edges too. Steady your watering rhythm and nudge the humidity up with a pebble tray or humidifier. Mineral buildup from heavily treated tap water can also burn the tips over time, so if your water is hard, an occasional flush or switching to filtered water helps.
No splits or fenestration. As covered above, this is usually youth, too little light, or both. Be patient with a young plant, give it the brightest indirect spot you have, and add a moss pole to encourage upward, mature growth.
Leggy, stretched growth. Long bare stems with leaves spaced far apart and a thin, reaching look mean too little light. Move the plant to a brighter spot, rotate it weekly so it doesn’t lean, and consider pruning the leggiest growth in spring to encourage a fuller habit.
Tiny black flies in the soil. Those are fungus gnats, which thrive in chronically damp topsoil, another nudge to water less. Letting the top inch dry out, adding yellow sticky traps, and treating with a BTI product such as mosquito bits will clear them. Here’s our full walkthrough on how to deal with fungus gnats.
For a deeper reference on this species and its growing conditions, the Missouri Botanical Garden’s plant finder entry for Monstera deliciosa is a reliable, citation-worthy source.
Repotting: when and how
Monsteras grow fast when they’re thriving, so plan on repotting every one to two years, but let the plant, not the calendar, make the call. Signs it has outgrown its pot include roots circling the surface or poking out the drainage holes, water running straight through without soaking in, soil that dries out within a day or two, and slowed growth despite good care.
When it’s time, repot in spring and move up just one pot size, an inch or two wider, with drainage holes. Refresh the same chunky aroid mix. Ease the root ball out, gently tease apart any tightly circling roots, and trim away anything dark, mushy, or foul-smelling, which is rot you want gone before it spreads. Set the plant at the same depth it grew before, since burying the stem invites rot.
If your monstera is already on a moss pole, repot the plant and its support together as one unit rather than wrestling them apart. After repotting, water once to settle the soil, then hold off on fertilizer for about a month while new roots establish. A little leaf droop in the following days is normal adjustment, not a sign you did something wrong.
Is a monstera toxic?
Yes, and this one matters more than with some beginner plants. Monstera deliciosa contains insoluble calcium oxalate crystals throughout its leaves and stems. If a curious cat or dog chews on it, those needle-like crystals irritate the mouth, tongue, and throat, causing drooling, pawing at the mouth, oral pain, and vomiting. It’s rarely life-threatening, but it’s genuinely unpleasant for a pet, so the ASPCA lists it as toxic to cats and dogs.
It’s mildly irritating to people too. The sap can bother sensitive skin, and a child who bites a leaf can get the same burning, swelling mouth reaction. None of this means you can’t keep one in a home with pets or kids, but place it where it’s hard to reach, such as up high, on a plant stand, or in a room they don’t frequent. Wash your hands after pruning. If you want a genuinely pet-safe alternative, the money tree is generally considered non-toxic and tolerates similar care.
Propagation: a quick note
One of the joys of a monstera is how readily it propagates, and it makes a great gift or a way to fill out a leggy plant. The key is the node: the small bump on the stem where a leaf, and usually an aerial root, emerges. A cutting must include a node to root, because that’s where new roots and growth come from. A leaf alone will never grow into a plant.
To propagate, use clean snips to cut a stem just below a node, ideally one that already has a stubby aerial root attached. Set the cutting in a glass of water with the node submerged, keep it somewhere bright and warm, and change the water every few days. Roots usually appear within a few weeks. Once they’re a couple of inches long, pot the cutting into your aroid mix and keep it lightly moist while it settles in. You can root cuttings directly in moist sphagnum or soil too, though water lets you watch the progress, which beginners tend to find reassuring.
The bottom line: give your monstera bright indirect light, water only when the top 2 inches dry out, plant it in a chunky aroid mix with a pot that drains, give it a moss pole to climb, feed lightly in the warm months, and keep it away from pets. Master the watering and light, and the splits will come on their own.