Plant-by-Plant Care
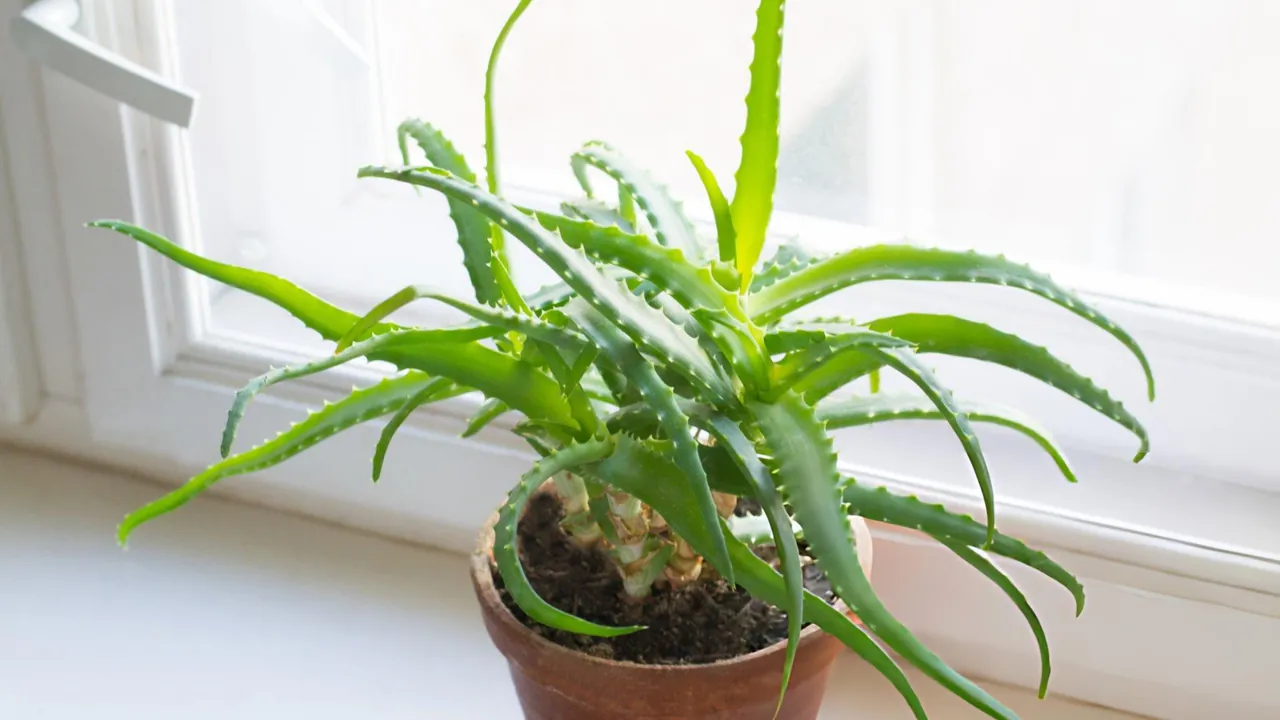
How to Care for an Aloe Vera Plant
How to care for an aloe vera plant indoors: bright light, gritty cactus mix, a draining pot, deep but rare watering, and fixes for mushy or curling leaves.
Disclosure: The Plant Pages is reader-supported. Some pages include ads and affiliate links, and we may earn a commission from qualifying purchases, at no extra cost to you.
Aloe vera looks tough, and it is, but the way most people kill it is by treating it like a typical leafy houseplant instead of the desert succulent it actually is. Quick answer: to care for an aloe vera plant indoors, give it the brightest spot you have, pot it in a gritty, fast-draining cactus or succulent mix in a container with a drainage hole, and water deeply but only after the soil has dried out completely. Feed lightly if at all. Almost every aloe that dies indoors dies from overwatering, so when you’re unsure, wait. Below I’ll walk through exactly how to care for an aloe vera plant, step by step, and what its leaves are telling you when something goes wrong.
Aloe vera care at a glance
Here’s the whole routine in one table. The sections below explain the why behind each line.
| Need | What the aloe vera wants |
|---|---|
| Light | The brightest spot you have; tolerates direct sun once acclimated |
| Water | Deeply, but only after the soil has dried out completely |
| Soil | Gritty, fast-draining cactus or succulent mix |
| Pot | Drainage hole required; terracotta is ideal |
| Humidity | Average to dry; no special humidity needed |
| Temperature | 55 to 80°F (13 to 27°C), no frost |
| Feeding | Light at most; diluted feed once or twice in the growing season |
| Repotting | Every 2 to 3 years, or when crowded with pups |
Start with one idea: it’s a succulent
Everything below follows from a single fact. Aloe vera is a succulent, a plant built to survive long dry stretches by storing water in its fat, fleshy leaves. That stored water is why the leaves feel firm and heavy, and it’s why the plant can shrug off your forgetting to water it for weeks. It’s also why constant moisture is so dangerous: a plant adapted to drought has no defense against roots that never get a chance to dry out.
So the whole care routine is really one instruction repeated in different forms. Mimic a dry, sunny, sharply draining habitat, and let the plant draw down its own reserves between waterings. Get that mindset right and the specifics, light, soil, pot, watering, almost take care of themselves.
Light: the brightest spot you have
Aloe vera wants a lot of light. Indoors, give it the brightest window in your home, a south- or west-facing sill is usually best, and don’t be shy about direct sun. An established, well-acclimated aloe genuinely enjoys several hours of direct light a day and grows compact and sturdy because of it.
The catch is acclimation. A plant that has been living in a dim corner or a low-light shop has soft, unhardened tissue, and moving it straight into blazing afternoon sun can scorch it, leaving brown or reddish-bronze patches that won’t heal. Step it up gradually instead: a little more light each day over a week or two lets the leaves toughen and color up. That reddish tint, by the way, is often just the plant’s response to strong sun and not a problem on its own, as long as the leaves stay firm.
In too little light you’ll see the opposite trouble. The plant stretches, the leaves go thin and floppy and may splay outward or curl, and the tight rosette loses its shape. If your brightest window still isn’t bright, especially in a north-facing room or through winter, a basic LED grow light on a timer for 10 to 12 hours a day keeps the rosette compact. Rotate the pot a quarter turn each week so the plant grows evenly rather than leaning toward the glass. If you want a plant for a genuinely dim spot, an aloe is the wrong choice; see our guide to the best indoor plants for low light instead.
Soil: gritty and fast-draining
Because the danger is always lingering moisture, your soil is doing half the work of keeping an aloe alive. Use a gritty, fast-draining cactus or succulent mix, the kind sold specifically for cacti and succulents. These mixes are coarse on purpose, full of sand, perlite, or pumice, so water rushes through and air gets back to the roots quickly.
Regular houseplant potting soil is a poor choice on its own; it’s built to hold moisture, which is exactly what you don’t want here. If a bagged cactus mix isn’t handy, you can cut standard potting mix with a generous amount of perlite, coarse sand, or pumice, roughly one part grit to one part soil, until it drains freely and never stays soggy. The goal is simple: water should pour through, not pool.
Pots: drainage hole required, terracotta ideal
This is non-negotiable. Plant your aloe in a pot with a drainage hole. Without one, water collects invisibly at the bottom and the roots sit in it, and no amount of careful watering fully fixes that.
Terracotta is the ideal material for an aloe. Unglazed clay is porous, so it wicks moisture out of the soil and breathes, which helps the root zone dry out between waterings, exactly the rhythm this plant wants. Plastic and glazed ceramic both hold water longer, so if you use them you’ll need to water even more cautiously. Whatever the material, avoid going much larger than the root ball: an oversized pot holds a big volume of damp soil the roots can’t use, and that slow-drying soil is a classic route to rot. Snug is safer than spacious.
Watering: the part that matters most
If you remember one thing about how to care for an aloe vera plant indoors, make it this. The plant is built to be watered deeply and then left alone until it’s genuinely dry. Frequent little sips keep the soil damp and that is what kills aloes.
The reliable method:
- Wait until the soil has dried out completely, all the way down, not just at the surface. Push a finger a couple of inches in; if you feel any moisture or coolness, wait.
- When it’s fully dry, water thoroughly until it runs from the drainage hole, so the whole root ball gets a real drink.
- Empty the saucer right away so the pot never stands in water.
- Then wait again. Let the soil dry out completely before the next watering.
Indoors this often works out to roughly every two to three weeks in the warm months and noticeably less in winter, when growth slows and the soil stays damp far longer. Treat those numbers as a loose guide, not a schedule. Light, pot size, pot material, and season all change how fast the soil dries, so the only reliable trigger is the soil itself being dry. If judging moisture by feel makes you nervous, an inexpensive moisture meter or simply lifting the pot to gauge its weight (light means dry) takes out the guesswork.
When you’re truly unsure, lean toward waiting. An aloe recovers easily from a missed watering by tapping its stored reserves; it recovers far less easily from rot. Underwatering is a slow, fixable mistake, and overwatering is often a fatal one.
Overwatering and rot: the single most common way aloes die
It’s worth being blunt about this, because it accounts for most dead aloes. When the soil stays wet, the roots can’t get oxygen, they begin to die and rot, and that rot creeps up into the base of the plant. From the top, you see the leaves turn soft, mushy, and water-soaked, sometimes translucent or yellow-brown, and the whole rosette may loosen or topple because there’s nothing firm holding it.
If you catch this early, act fast. Stop watering immediately. Slide the plant out of its pot and look at the roots: healthy roots are firm and pale, while rotted ones are dark, soft, and may smell sour or slimy. Trim away every mushy root and any black, water-soaked section at the base with clean scissors, cutting back to firm green tissue. Let the cuts air-dry for a day or two, then repot into fresh, dry, gritty mix in a clean pot with a drainage hole, and hold off watering for about a week to let the wounds seal. If a good portion of the plant is still firm, it often pulls through. If the entire base has turned to mush, the plant may be too far gone to save, though a firm, healthy leaf or an unaffected pup can sometimes be rooted to start over. For more on getting the rhythm right, see our deeper guide on how often to water an aloe vera plant.
Feeding: light at most
Aloe vera is a light feeder and honestly does fine with no fertilizer at all in fresh soil. If you want to feed it, that’s a judgment call rather than a requirement. During the growing season in spring and summer, you can use a balanced houseplant or cactus fertilizer diluted to about half strength, just once or twice across the whole season. Skip feeding entirely in fall and winter, when the plant is barely growing.
Err on the side of less. Aloes are far more often harmed by too much fertilizer than too little; excess salts build up in the soil and burn the roots and leaf tips. Always feed right after a normal watering rather than onto dry soil, so the diluted solution spreads evenly instead of concentrating against the roots, and never feed a stressed, newly repotted, or rotting plant.
Reading the leaves: common problems and what they mean
The wonderful thing about a succulent is that its leaves are an honest gauge. Learn to read them and you can correct course before any real damage is done. Here are the three signals you’ll see most.
Thin, curling, or wrinkled leaves. When the firm, plump leaves go thin and start to curl inward, wrinkle, or droop, the plant is drawing down its own water reserves. The usual cause is too little water, too little light, or both. Give it a thorough deep watering, move it to the brightest spot you have, and the leaves should plump back up over the following days. This is the easy, recoverable end of the spectrum.
Soft, mushy, translucent leaves. This is the opposite problem and the more serious one. Leaves that feel squishy, look water-soaked or see-through, or turn a sickly yellow-brown are the signature of overwatering, and they’re often the visible tip of root rot below. Stop watering at once and follow the rot-rescue steps above: check the roots and base, cut away anything mushy, let it dry, and repot in dry, gritty mix. Catching it early is everything.
Brown, crispy tips or patches. Crispy brown leaf tips and edges usually come down to sun stress or erratic watering. A plant pushed into intense direct sun too fast can scorch, leaving dry brown or reddish patches, so acclimate it gradually. Watering that swings between bone-dry-for-too-long and soaked also stresses the leaf margins into browning. Steadier watering (still letting the soil dry fully, just not for weeks past that point) and a gentler transition into bright light both help. Note these brown spots are cosmetic and won’t turn green again; new growth will simply come in healthy once conditions even out.
A couple of other things worth knowing. A few tiny black flies hovering over the soil are fungus gnats, which breed in chronically damp topsoil, yet another sign you’re watering too often; let the soil dry fully and they’ll clear. And the occasional shriveling of the lowest, oldest leaves while the rest of the plant looks great is just normal aging, not a problem to fix.
Temperature and humidity
Aloe vera is comfortable in ordinary room conditions, roughly 55 to 80°F (13 to 27°C). It has no need for extra humidity, dry household air suits it perfectly, which is one more way it differs from fussier tropical houseplants. Do keep it away from frost, though: it has no tolerance for freezing, so if you summer it outdoors, bring it in well before the first cold snap. Cold, wet conditions together are especially dangerous, so ease off watering even further when temperatures drop.
Propagating from pups
A happy, established aloe rewards you by making more of itself. It sends up pups, small offset plantlets, around the base of the parent. Once a pup is a few inches tall and has formed some roots of its own, you can separate it to grow a whole new plant, and removing pups also keeps the parent from getting overcrowded.
To do it, slide the whole plant out of its pot so you can see where the pup attaches. Gently work the pup free with as many of its own roots as you can, separating it from the parent (a clean cut is fine if they’re firmly joined). Let the separated pup sit out for a day or two so the cut surface dries and calluses, which guards against rot. Then pot it in dry cactus or succulent mix, wait about a week, and begin watering lightly. From there, treat it exactly like a grown aloe. It’s one of the more forgiving propagation projects in houseplant keeping, on par with how easy beginner plants like the money tree are to live with.
Harvesting the gel
The clear inner gel is the reason many people keep aloe vera in the first place, and a mature plant lets you harvest a leaf or two without harm. Choose a thick, healthy outer leaf, the oldest, lowest leaves are largest and most mature, and cut it close to the base with a clean knife. Stand the cut leaf upright, cut-end down, for a few minutes to let the yellow sap, called latex, drain out; it can irritate skin and stomach, so you want it gone.
Then lay the leaf flat, trim off the spiny edges, and slice it open lengthwise to scoop out the clear gel inside. Most people use the gel topically, applying it to minor skin irritation, and the freshly cut leaf keeps a few days in the fridge. A word of caution: this is general plant-care information, not medical advice. Don’t eat raw aloe gel without proper guidance, since the latex in particular can cause stomach upset, and keep harvesting modest so the plant has plenty of healthy leaves left to power its own growth.
Signs you’re getting it right
You’ll know your routine is working when the leaves are thick, firm, and plump, the rosette is tight and compact rather than stretched and floppy, and the color is a healthy green (with maybe a sun-kissed tinge in a bright window). New leaves emerging from the center and pups appearing around the base are both signs of a genuinely happy plant. And the soil should be drying out fully and fairly quickly between waterings, which tells you the grit, the draining pot, and your watering rhythm are all working together.
The bottom line: treat your aloe as the desert succulent it is. Give it the brightest light you’ve got, plant it in gritty mix in a pot that drains (terracotta if you can), water deeply but only when it’s bone dry, feed lightly if at all, and resist the urge to fuss. Master the watering and everything else falls into place.