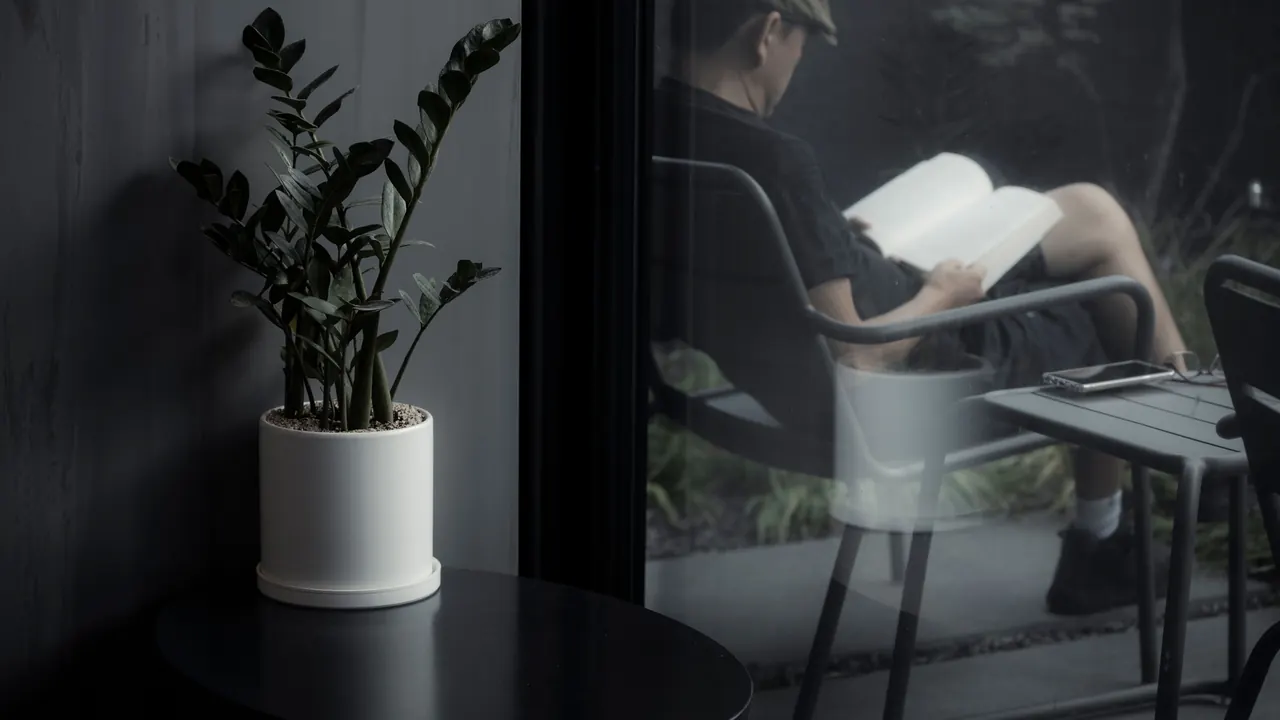
Propagation
How to Propagate a ZZ Plant
Learn how to propagate a ZZ plant two ways: fast rhizome division and slow leaf cuttings. Water vs soil, why it's slow, and how to be patient for results.
Disclosure: The Plant Pages is reader-supported. Some pages include ads and affiliate links, and we may earn a commission from qualifying purchases, at no extra cost to you.
If you love your ZZ plant and want more of them for free, the good news is that propagation is genuinely easy. The catch is that it asks for a lot of patience. Quick answer: propagate a ZZ plant (Zamioculcas zamiifolia) one of two ways: divide the underground rhizomes when you repot for instant new plants, or take leaf and stem cuttings to root in water or soil, which is nearly foolproof but painfully slow because each cutting must grow a brand-new rhizome before a single shoot appears. Division is the fast track; cuttings are the long game. Below I’ll walk through exactly how to propagate a ZZ plant with both methods, and how to set your expectations so the wait doesn’t worry you.
Two methods, two very different timelines
There are really only two ways to make new ZZ plants at home, and choosing between them comes down to whether you have a big plant to split and how long you’re willing to wait.
| Method | Speed | Best for |
|---|---|---|
| Rhizome division | Fast: instant plants | A mature, crowded plant you’re already repotting |
| Leaf or stem cuttings | Very slow: many months | Multiplying from a small plant or a single stem |
Division gives you finished, full-sized plants the same day, but you need an established parent with enough rhizomes to split. Cuttings let you create many plants from very little material, even a few leaves, but you’ll be waiting most of a year to see results. Neither is hard. They just suit different situations.
Why ZZ plants are so slow to propagate
Before the how, it helps to understand the why, because it explains every odd thing about this plant’s propagation. The ZZ plant grows from a rhizome, a swollen underground storage stem that looks a bit like a small potato. Those rhizomes bank water and energy, which is exactly why the plant shrugs off drought and neglect.
That same storage strategy makes propagation slow. When you take a cutting, the cutting cannot just sprout a new stem the way a pothos vine does. It first has to build a new rhizome from scratch, growing that little storage organ before it has the reserves to push out roots and eventually a shoot. Forming a rhizome takes months, and only after it exists does new top growth begin.
So if you propagate from cuttings, you’re not waiting for a stem to grow. You’re waiting for an entirely new underground organ to form first. Knowing this saves a lot of anxious checking. A cutting that looks like it’s doing nothing for two or three months is usually working hard out of sight.
Method 1: dividing the rhizomes (the fast way)
Division is the quickest, most reliable way to multiply a ZZ plant, and the best part is you can fold it into a repotting you were going to do anyway. A healthy, mature plant naturally produces multiple rhizomes over time, packing the pot until it’s crowded. Each cluster of stems usually rises from its own rhizome, which means the plant is, in effect, already several plants sharing one container.
Here’s how to divide it:
- Water lightly a day ahead. Slightly moist soil slides off the roots more easily than bone-dry soil and reduces snapping.
- Slide the plant out of its pot. Tip it sideways and ease the root ball free. With a snug pot you may need to run a knife around the inside edge.
- Brush away the soil. Loosen the mix with your fingers until you can see the chunky rhizomes and how the stems connect to them.
- Find the natural divisions. Look for separate rhizome clusters, each with its own group of stems and its own roots. Those seam lines are where you’ll split.
- Separate the clumps. Gently tease the rhizomes apart by hand. If they’re truly fused, cut between them with a clean, sharp knife, giving each division at least one rhizome, a few stems, and some roots.
- Pot each division. Plant each piece in its own pot of fast-draining mix at the same depth it grew before, water once to settle the soil, and you’re done.
Each division is already a complete plant with stems and roots, so there’s no waiting for it to “take.” It simply continues growing. Spring and early summer are the ideal time to divide, when the plant is actively growing and recovers fastest, though a healthy ZZ tolerates division at most times of year. After potting, treat the new plants like any established ZZ: bright indirect light, and watering only when the soil has dried out. Hold off on fertilizer for a month or so while roots resettle.
Method 2: leaf and stem cuttings (the slow way)
Cuttings are the method to reach for when you don’t have a big plant to divide, or when you want to turn one stem into several new plants. It’s almost impossible to mess up, but it is a test of patience.
You have two cutting options, and stem cuttings tend to be faster and more reliable than single leaves.
Stem cuttings. Cut a whole stem (one of the arching stalks lined with leaflets) near the base with clean, sharp scissors. You can root the full stem, or cut it into sections that each include a couple of leaflets. More tissue means more stored energy to build a rhizome, which is why stem cuttings generally outpace single leaves.
Leaf cuttings. You can also propagate from individual leaflets, the small paired leaves along each stem. Gently pull or snip a leaflet so a tiny bit of the base comes with it. This is the slowest approach of all because a single leaflet has the least energy to work with, but it’s a great way to make a lot of plants from one stem.
Whichever you pick, the steps that follow are the same. Let the cut surface dry, or callous, for a few hours to a day before you root it. This small step helps prevent the cut end from rotting once it meets moisture.
From there you choose your rooting medium: water or soil.
Water vs soil: which rooting method to use
Both water and soil work for ZZ cuttings, and the timeline is similar either way. The choice mostly comes down to whether you’d rather watch the progress or skip a transplant step.
Rooting in water. Place the calloused end of a stem or leaflet in a glass of room-temperature water, with the leaves above the waterline, and set it in bright, indirect light. The big advantage is visibility: you’ll actually see the new rhizome swell and the roots emerge, which is reassuring during such a long wait. Change the water every week or two to keep it fresh and oxygenated. The downside is that water roots are slightly more delicate, so moving the cutting to soil later can cause a little transplant shock. Once you see a small rhizome with roots an inch or two long, pot it up into a fast-draining mix.
Rooting in soil. Insert the calloused end into a small pot of moist, well-draining potting mix, firm it gently so it stands upright, and keep the mix lightly moist but never soggy. The advantage here is that the cutting roots directly into its permanent home, so there’s no transplant shock down the line. The trade-off is that you can’t see what’s happening underground; you’ll have to trust the process and resist the urge to dig around. After several months, a gentle, very light tug that meets resistance tells you roots have formed.
For beginners, water rooting is the more satisfying choice simply because you can see it working. If you’ve propagated before and trust the wait, soil saves you a step. There’s no wrong answer, and many growers like to try both at once to compare.
Patience: the real skill in ZZ propagation
If there’s one thing that separates a successful ZZ propagation from a frustrated one, it’s expectations. This plant operates on its own slow clock, and fighting that clock is the main way people go wrong.
Here’s a realistic timeline for cuttings. For the first several weeks, nothing visible happens. Over the following months, a small rhizome begins to form at the base of the cutting, and roots follow. Only after that storage organ is established, often six to nine months in and sometimes longer, will a new shoot finally push up. Division, by contrast, skips this entire wait because you’re moving plants that already have rhizomes.
A few things help you stay patient and avoid sabotaging the process:
- Don’t keep pulling cuttings out to check. Every disturbance sets progress back. In water you can see enough through the glass; in soil, leave it be.
- Judge by firmness, not speed. A cutting that stays firm and green is fine, even if it looks idle for months. Only a mushy, yellowing, or shriveled cutting has actually failed.
- Keep conditions steady. Bright indirect light and warmth (room temperature or a touch warmer) speed rhizome formation. Cold slows everything down.
- Go easy on water. A waterlogged soil cutting rots before it roots. Lightly moist is the target, and let the surface dry between waterings once it’s established.
It also helps to start more cuttings than you think you need. They’re free, after all, and rooting a handful at once cushions you against the occasional dud and gives you more finished plants at the end of the long wait.
After your new ZZ plants have rooted
Once a division is potted or a cutting has built a rhizome with a few roots and a new shoot, you’re back to ordinary ZZ plant care, which is wonderfully low-effort. Give the new plant bright, indirect light, though it will also tolerate lower light better than most houseplants. Water only when the soil has dried out, since the fresh rhizome stores moisture and rots easily if it stays wet. Use a fast-draining mix in a pot with drainage holes, and wait until the plant is clearly growing before you start feeding it lightly in spring and summer.
New ZZ plants grow slowly, just like their parent, so don’t expect a burst of leaves right away. A young plant may sit with just a stem or two for a while as it builds its underground reserves. That’s normal. Steady, unhurried growth is exactly what this plant does.
One safety note worth repeating: the ZZ plant contains calcium oxalate crystals, so it’s mildly toxic to cats, dogs, and people if chewed. Keep cuttings and finished plants out of reach of curious pets and kids, and wash your hands after handling cut stems, since the sap can irritate skin.
Common questions and quick troubleshooting
Most propagation worries trace back to the plant’s slow pace, but a few real problems do come up.
My cutting hasn’t done anything in two months. That’s completely normal for a ZZ. Remember it has to build a rhizome before any top growth shows. As long as the cutting is firm and green, keep waiting.
The cutting turned soft, yellow, or mushy. This one has actually failed, usually from rot. In water it often means the water went stale or too much of the leaf sat submerged; in soil it usually means the mix stayed too wet. Start fresh with a new cutting, let the cut end callous first, and keep soil only lightly moist.
A division wilted after repotting. Some droop is normal transplant adjustment. Keep it in bright indirect light, water sparingly, and give it a couple of weeks. ZZ rhizomes hold plenty of reserves to recover.
I want more plants faster. Then division is your method, not cuttings. If you only have a small plant, the honest answer is that cuttings simply take months and there’s no shortcut. Starting several cuttings at once is the closest thing to speeding it up.
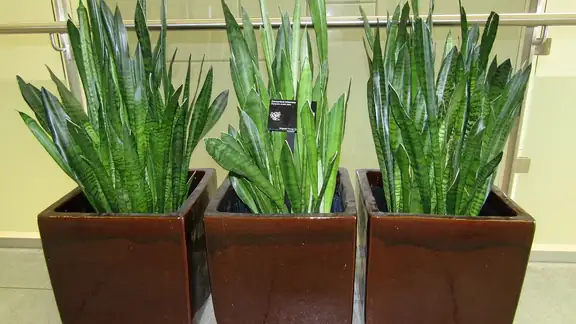
If you’d like to practice the broader skill of splitting and rooting houseplants on something that gives quicker feedback, the snake plant is a great companion project; here’s our full guide on how to propagate a snake plant, which also roots from divisions and leaf cuttings but tends to show results sooner.
For a reliable reference on this species and its growing conditions, the Missouri Botanical Garden’s plant finder entry for Zamioculcas zamiifolia is a solid, citation-worthy source.
The bottom line
To propagate a ZZ plant, pick the method that fits your situation. If you have a mature, crowded plant, divide the rhizomes for instant new plants. If you’re starting from a single stem or want many plants from little material, take leaf or stem cuttings and root them in water or soil, then settle in for a wait of several months while each cutting grows its own rhizome. The technique is easy. The patience is the hard part. Get your expectations right, leave the cuttings alone, and you’ll end up with a whole shelf of these tough, glossy plants for nothing.