Pests & Disease
How to Get Rid of Spider Mites on Houseplants
How to get rid of spider mites on houseplants: spot the webbing and stippling, isolate, rinse, treat with neem or soap, and break the egg cycle for good.

Disclosure: The Plant Pages is reader-supported. Some pages include ads and affiliate links, and we may earn a commission from qualifying purchases, at no extra cost to you.
If you’ve noticed faint webbing in the crook of a leaf or a stippled, faded look creeping across your plant, you may be dealing with one of the most common and frustrating indoor pests. Quick answer: to get rid of spider mites on houseplants, isolate the infested plant right away, rinse it under a strong stream of water or in the shower to knock mites off, then treat every 5 to 7 days with insecticidal soap or neem oil, raise the humidity since mites thrive in dry air, and keep treating for two to three weeks to outlast the egg cycle. Wipe the leaves between treatments. Below I’ll walk through exactly how to spot, treat, and finally clear spider mites for good.
What spider mites are and why they’re so persistent
Spider mites are tiny arachnids, not insects, and most indoor trouble comes from the two-spotted spider mite (Tetranychus urticae). They’re roughly the size of a grain of pepper, so you’ll usually notice the damage and webbing before you ever see the mites themselves. They pierce leaf cells and drain the contents, which is what gives infested foliage that dusty, speckled, washed-out look.
The reason they’re so hard to shake comes down to two things: speed and eggs. In the warm, dry air of a heated or air-conditioned home, a population can explode in a couple of weeks. A female lays dozens of eggs over her short life, and those eggs hatch in roughly three to five days. Most sprays kill the moving mites but leave many of the eggs unharmed, so if you treat once and stop, a fresh generation hatches days later and you’re right back where you started. Beating them is less about one perfect spray and more about persistence across the whole egg cycle.
How to identify spider mites (before they spread)
Catching mites early makes the whole job easier, so it pays to know the signs. Here’s what to look for, roughly in the order you’ll notice it.
- Stippling on the leaves. The earliest and most reliable sign is fine speckling: tiny pale, yellow, or silvery dots scattered across the leaf surface where mites have drained individual cells. From a distance the leaf looks faded, dull, or dusty rather than its usual rich green.
- Fine webbing. As an infestation grows, you’ll see delicate, silky webbing strung across leaf joints, along stems, and especially around the growing tips. It looks like a thin layer of dust or cobweb and is the clearest confirmation that you’re dealing with mites and not something else.
- Tiny dots on the undersides. Flip a leaf over and look closely, ideally with a magnifying glass. Spider mites cluster on the undersides, appearing as minute moving specks, often pale, reddish, or with two dark spots. Fine grit that moves is mites; grit that doesn’t is just dust.
- Overall decline. Heavily fed-on leaves yellow, dry at the edges, curl, and eventually drop. A badly infested plant looks bronzed and tired all over.
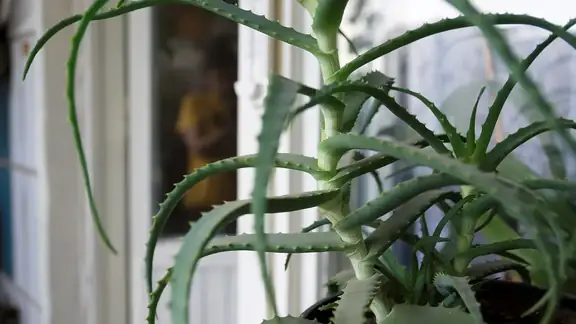
A quick confirmation trick: hold a sheet of white paper under a suspect leaf and tap or shake the foliage. If small specks fall onto the paper and start to crawl, you have spider mites. Plants with thin, smooth leaves are favorites, so check the usual targets closely, including calatheas, ivy, palms, and many tropicals.
Step 1: Isolate the infested plant immediately
The first move, before any treatment, is to separate the affected plant from the rest of your collection. Spider mites spread easily, drifting on air currents, hitching a ride on your hands or watering can, and simply crawling from leaf to touching leaf. One quietly infested plant can seed an entire shelf.
Move the plant to a separate room or at least well away from its neighbors, with no foliage touching. While you’re at it, inspect every plant that was sitting nearby, paying special attention to leaf undersides, because mites are often further along on a second plant than you’d guess. Wash your hands after handling the infested plant and before touching healthy ones, and don’t share the same damp cloth between plants. Keep the plant in quarantine until you’ve gone a couple of weeks with no sign of mites, not just until the visible webbing is gone.
Step 2: Rinse the plant to knock mites off
Before you reach for any product, give the plant a thorough rinse. A strong stream of water is a genuinely effective first strike: it physically blasts away a large share of the adult mites, their eggs, and the webbing, which immediately lowers the population and makes everything you do next more effective.
Take the plant to a sink, shower, or outside with a hose, and wash it with lukewarm water (never icy cold). The single most important detail is to aim for the undersides of the leaves, where mites live and lay, not just the tops. Tilt and turn the plant so the spray reaches into the leaf joints and around the growing tips where webbing collects. Support delicate leaves with your free hand so a forceful stream doesn’t tear them.
Let the plant drain fully before moving it back to quarantine, and don’t let it sit in standing water in a saucer or cachepot afterward. Rinsing alone won’t eradicate mites, since it misses plenty of eggs, but it’s a strong, chemical-free head start and worth repeating every few days alongside your main treatment.
Step 3: Treat with insecticidal soap or neem oil
Rinsing thins the herd; a treatment finishes the job. For houseplants, two reliable, widely available options are insecticidal soap and neem oil. Both are gentler than harsh chemical miticides and well suited to indoor use, and the key with either is thorough, repeated coverage rather than a single heavy soaking.
Insecticidal soap works on contact by breaking down the soft bodies of mites, so it only kills what it actually touches. That makes coverage everything. Spray until the leaves are wet on both sides, getting deep into the undersides, the leaf axils, and the growing tips. Because it has no lasting residue, you’ll need to reapply on a regular cycle to catch newly hatched mites.
Neem oil works differently. It coats and smothers mites and, as a feeding and reproduction disruptor, discourages the survivors from eating and breeding. It acts more slowly than soap but offers a bit more lingering effect. Mix it according to the label (usually with a few drops of mild soap to help it emulsify in water), and again, coat both sides of every leaf.
A few rules keep treatment safe and effective:
- Never spray in direct sun or high heat. Oils and soaps on sunlit leaves can scorch them. Treat in the evening or in a shaded spot, and let the plant dry out of direct light.
- Don’t treat a thirsty, wilted plant. A heat- or drought-stressed plant is far more likely to suffer leaf damage. Water it first and let it recover before you spray.
- Test first if you’re unsure. On sensitive or thin-leaved plants, treat one leaf and wait 24 hours to check for burn before doing the whole plant.
- Cover everything. Mites hide in the smallest crevices, so any leaf you skip becomes a refuge that restarts the infestation.
Whichever product you choose, the schedule matters more than the brand. Apply every 5 to 7 days without fail, because that interval catches each new batch of mites as it hatches but before it can mature and lay more eggs.
Step 4: Raise the humidity (mites hate it)
Here’s a piece of the puzzle people often miss: spider mites flourish in hot, dry conditions, which is exactly why they tend to appear in winter when indoor heating dries out the air. Making the environment less hospitable is a real part of the fix, not an afterthought.
Raising the humidity around your plants slows mite reproduction and discourages a new outbreak. You don’t need anything elaborate. A small humidifier running near your plants is the most effective option. A pebble tray (a shallow dish of water with stones, the pot resting on the stones above the waterline) adds steady moisture as the water evaporates. Grouping plants together also creates a slightly more humid pocket of air. If you want the deeper reasoning on why misting is a weak tool for this compared to those methods, the short version is that mist evaporates in minutes and barely moves ambient humidity, while wet leaves left sitting can invite fungal issues.
Good airflow helps too. Stuffy, still, dry air is mite heaven, so a gently circulating fan and a less arid room together make conditions much harder for them to rebound.
Step 5: Wipe the leaves between treatments
Between sprays, wiping the foliage by hand is a small chore that pays off. A soft cloth or sponge dampened with plain water (or a mild soapy solution) physically removes mites, eggs, and the webbing that sprays don’t always penetrate. That webbing can actually shield mites underneath it, so clearing it away makes your next treatment land better.
Wipe each leaf gently on both sides, supporting it from below, and give extra attention to the undersides and the leaf joints. Rinse or replace the cloth often so you’re not just shuffling mites from one leaf to another, and never reuse that cloth on a healthy plant. On plants with lots of small or fuzzy leaves where wiping isn’t practical, lean harder on rinsing and spraying instead.
Step 6: Be persistent for two to three weeks
This is the step that decides whether the mites come back, and it’s the one most people cut short. Because eggs hatch every few days and survive most sprays, a single treatment, or even two, almost never clears an infestation. You have to keep going long enough to outlast the entire egg cycle.
Stay on a strict 5 to 7 day rhythm: treat, then rinse and wipe between treatments, then treat again. Keep this up until you’ve gone two full weeks with zero new mites, stippling, or webbing, which in practice usually means two to three weeks of active work from when you started. Inspect the leaf undersides at every round, because that’s where a comeback shows up first. It’s tempting to declare victory the moment the visible webbing disappears, but stopping early leaves a hidden generation to rebuild, and within a week or two you’re back at square one. Patience genuinely is the deciding factor here.
Once the plant has been clean for a couple of weeks, you can return it to its usual spot, though it’s wise to keep checking it periodically and to keep the air a touch more humid going forward.
Preventing the next outbreak
Clearing mites is harder than keeping them away, so a few habits make repeat infestations far less likely:
- Quarantine new plants. Isolate any new arrival for a couple of weeks and inspect the leaf undersides before it joins your collection. New plants are the most common way mites walk in the door.
- Inspect regularly. Glance at the undersides of leaves when you water, especially on thin-leaved favorites. Early detection turns a major project into a quick fix.
- Keep the air from getting bone-dry. Since mites love dry air, steady humidity in winter is one of the best deterrents you have.
- Keep plants healthy. A well-watered, properly lit, unstressed plant resists and recovers from pests better than a struggling one.
- Wipe down dusty leaves now and then. Clean foliage gives mites fewer places to settle in unnoticed.
When to cut your losses
Most infestations are beatable with patience, but occasionally a plant is so overrun, fully bronzed, webbed over, and dropping leaves, that saving it risks the rest of your collection. If a plant isn’t precious to you and the mites are winning despite weeks of effort, it can be wiser to discard it (bagged and in the trash, not the compost) than to keep a reservoir of mites alive near your healthy plants. For a valued plant, you can sometimes salvage healthy growth by cutting it back hard and treating the survivors, but be honest about the time it takes.
Spider mites are persistent, not unbeatable. If you spot them early, isolate fast, and commit to the full two to three week cycle of rinsing, treating, raising humidity, and wiping, you’ll clear them and keep them gone. And if you’ve also noticed tiny black flies hovering around the soil rather than mites on the leaves, that’s a different pest with a different fix, covered in our guide on how to get rid of fungus gnats on houseplants.