Propagation
How to Propagate a Prayer Plant
Learn how to propagate a prayer plant two reliable ways: stem cuttings rooted in water or soil, and dividing the rootball at repotting time.
Disclosure: The Plant Pages is reader-supported. Some pages include ads and affiliate links, and we may earn a commission from qualifying purchases, at no extra cost to you.
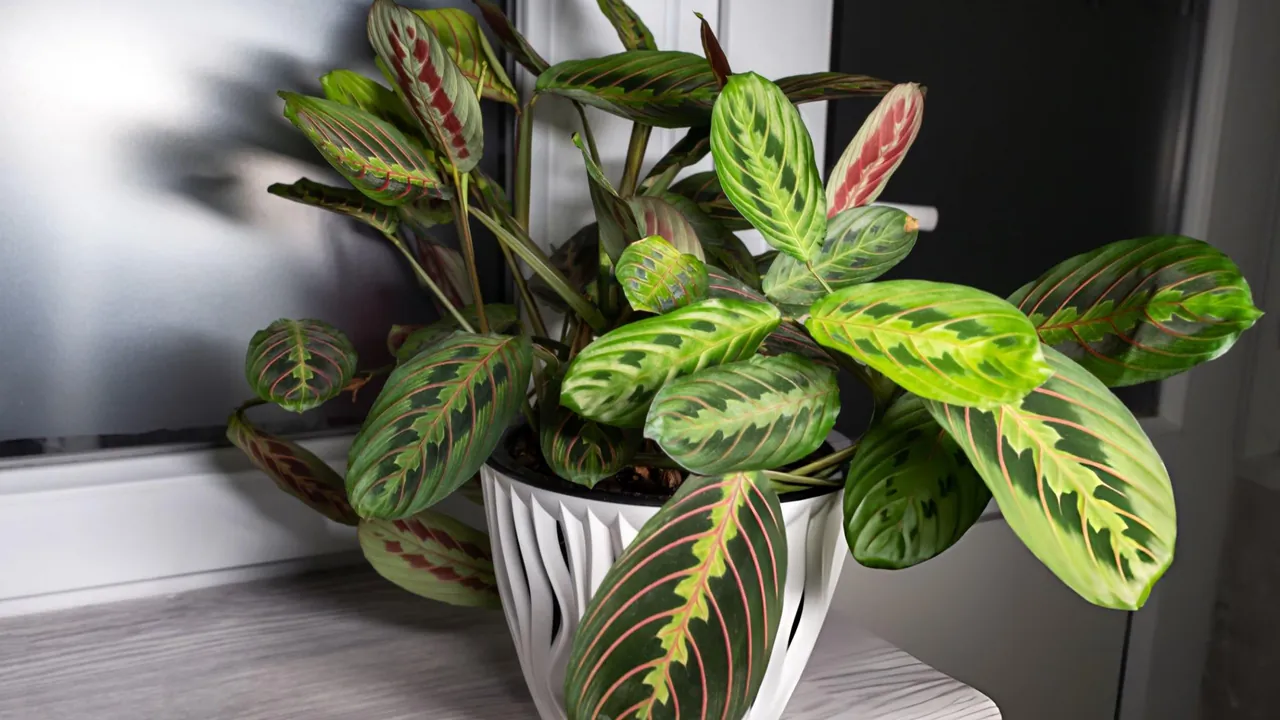
If your prayer plant has filled out and you want more of it for free, you’re in luck: Maranta leuconeura is one of the more cooperative houseplants to multiply. Quick answer: propagate a prayer plant either by taking stem cuttings (snip just below a node, then root the piece in water or moist soil under high humidity, with roots in about 2 to 4 weeks) or by division (separate the rootball into clumps when you repot). Both methods reward warmth, steady moisture, and bright indirect light. Below I’ll walk through exactly how to propagate a prayer plant with each method, what to do after roots appear, and how to avoid the few mistakes that stall a cutting.
Two methods, and when to pick each
There are two reliable ways to make new prayer plants, and they suit different situations.
| Method | Best for | What you get |
|---|---|---|
| Stem cuttings | Most plants, most of the time | Several small plants over a few weeks |
| Division | Repotting a large, multi-clump plant | Instant full-sized plants right away |
Stem cuttings are the everyday choice. Prayer plants grow on trailing stems with clearly spaced nodes, and those nodes root willingly, so a single healthy plant can yield several cuttings without much fuss. This is the gentler option for the parent plant, and it’s the method to start with.
Division is the move when you’re already repotting a mature, bushy plant that has spread into multiple crowns. Instead of waiting weeks for roots, you split the rootball and immediately have two or three established plants. The trade-off is that division disturbs the roots more, so it’s best timed with a repot rather than done on a whim.
Many growers use both: divide a crowded plant at repotting time, and take a few stem cuttings from the trimmings so nothing goes to waste.
Before you start: timing and tools
The active growing season, spring through summer, is the best window for either method. That’s when the plant has the energy to push new roots and recover quickly. You can propagate in fall or winter, but expect slower rooting and a higher chance of a cutting sitting and sulking, so it’s a judgment call rather than a hard rule.
You don’t need much:
- Clean, sharp scissors or snips. Wipe the blades with rubbing alcohol first so you don’t introduce rot into a fresh cut.
- A clear glass or jar (for water rooting) or a small pot with drainage holes and fresh, loose potting mix (for soil rooting).
- A way to raise humidity: a clear plastic bag, an upturned clear container, or a propagation box. Prayer plants love moisture, and a humid bubble around the cutting is the single biggest thing you can do to improve your odds.
- Optional: rooting hormone. It isn’t necessary for prayer plants, which root readily on their own, but a light dip can nudge a stubborn cutting along.
Method 1: stem cuttings
This is the workhorse method, so I’ll go through it in detail.
Find the node
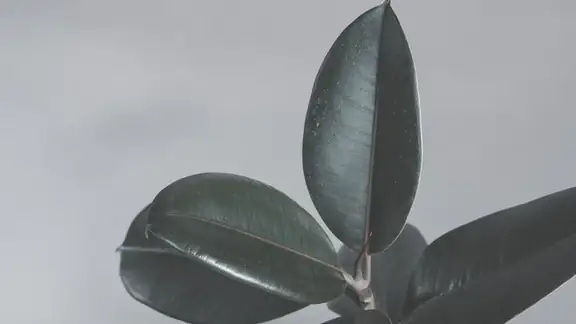
Look along a stem for a node: the slightly swollen joint where a leaf (and often a small sheath) meets the stem. Nodes are where roots emerge, so this is the part that matters. The stretch of bare stem between two nodes is an internode, and it won’t root on its own. Every cutting you take must include at least one node, ideally with a leaf or two attached above it.
Make the cut
Using your clean scissors, cut just below a node, leaving roughly a quarter inch of stem beneath it. A good cutting is about 4 to 6 inches long and carries one or two healthy leaves above the node. If the lower leaf would end up sitting in water or buried in soil, pinch it off so only the node goes under; submerged or buried leaves rot and foul the water.
A few practical notes:
- Take cuttings from healthy, firm stems, not yellowing or limp ones.
- More than one node per cutting is fine and gives you more rooting points, but keep at least one leaf up top to fuel the cutting.
- You can take several cuttings from one long trailing stem, as long as each piece has its own node.
Root it in water
Water rooting is popular because you can watch progress, which is reassuring while you learn.
- Fill a clear glass with room-temperature water.
- Set the cutting in so the node sits below the surface and the leaves stay above it.
- Place the glass in bright, indirect light. Direct sun overheats the water and can cook tender new roots.
- Refresh the water every two to three days, or sooner if it clouds. Clean water carries more oxygen and discourages rot.
Tiny white roots usually appear at the node in about 2 to 4 weeks. Once they reach roughly 1 to 2 inches, the cutting is ready to pot up (more on the transition below). Don’t let water roots grow long and tangled before potting; shorter roots adapt to soil more easily than a big established water-root system.
Root it in soil
Soil rooting skips the water-to-soil transition shock, since the cutting forms roots already suited to soil. It’s a little less visible, so you’re trusting the process more.
- Fill a small pot with a loose, moisture-retentive mix. A peat- or coir-based houseplant mix with a handful of perlite works well: it holds moisture without going swampy.
- Moisten the mix so it’s evenly damp, not soaking.
- Poke a hole with a pencil, set the node and a little stem into it, and firm the soil gently around it so the node has good contact.
- Cover the pot with a clear bag or dome to lock in humidity, leaving a small gap or lifting it daily for a few minutes of fresh air so mold doesn’t set in.
- Keep the mix lightly moist (not wet) and place the pot in bright, indirect light.
Roots form over a similar 2 to 4 week window. You’ll know they’ve taken when the cutting resists a very gentle tug and starts pushing new growth. Soil-rooted cuttings don’t need a separate potting-up step; they’re already home.
Humidity is the make-or-break factor
I’ll stress this because it’s where most prayer plant cuttings fail or succeed: these are humidity-loving plants, and a cutting has no roots yet to replace water lost through its leaves. A clear cover, bag, or propagation box keeps the air around the cutting moist and dramatically improves rooting. Without that humid bubble, leaves can crisp and the cutting can give up before roots form. Just remember to vent the cover briefly each day so stagnant, damp air doesn’t breed fungus.
Method 2: division
Division is the fastest route to mature plants, and it pairs naturally with repotting.
When to divide
Divide when you’re already repotting a large prayer plant that has grown into several distinct clumps or crowns, typically every couple of years in spring. A plant that’s outgrown its pot, with roots circling the surface or poking from the drainage holes, is a good candidate. Don’t divide a small or single-crown plant; there’s nothing to separate, and you’ll only set it back.
How to divide
- Water the plant a day before so the rootball slides out cleanly and the roots are hydrated.
- Ease the plant out of its pot and gently brush or shake away loose soil so you can see the root structure and where the natural clumps separate.
- Tease the rootball apart into two or more sections by hand, following the natural divisions between crowns. For tightly knit roots, you can cut through them with a clean knife, but try to keep each division with a generous share of both roots and stems.
- Pot each division into its own container with fresh, loose mix, at the same depth it grew before. Firm the soil lightly and water it in.
After dividing, keep the new plants warm, humid, and in bright indirect light while they settle. A little wilting or droop in the first week is normal as the roots recover; steady conditions and patience sort it out. Hold off on fertilizer for about a month so the disturbed roots aren’t pushed before they’re ready.
After propagation: settling new plants in
However you propagated, the goal now is steady, gentle conditions while the young plants establish.
- Light. Bright, indirect light. Prayer plants scorch in direct sun, and new plants are even more sensitive than established ones.
- Humidity. Keep it high. If you rooted under a cover, vent it more often over a week or two before removing it entirely, so the plant hardens off gradually rather than hitting dry room air all at once.
- Water. Keep the soil lightly and evenly moist. Prayer plants dislike both bone-dry soil and waterlogged roots, so aim for consistently damp. Letting the very top dry slightly between waterings is fine.
- Warmth. Normal room temperatures, roughly 65 to 80°F (18 to 27°C), suit them. Keep new plants away from cold drafts and the dry blast of heating or AC vents.
- Feeding. Wait about a month, then start with a diluted, balanced houseplant fertilizer during the growing season only.
For the full long-term routine once your new plants are growing, a dedicated care guide is worth bookmarking. Prayer plants share the Marantaceae family and much of their care with calatheas, so our guide on how to care for a calathea plant covers the same humidity, light, and watering principles that keep both genera happy.
Prayer plant vs. calathea: same family, different propagation
People often lump prayer plants and calatheas together, and for good reason: both belong to the Marantaceae family, both fold their leaves up at night in the “prayer” movement (technically called nyctinasty), and both want warmth, humidity, and bright indirect light. Their day-to-day care overlaps heavily.
Propagation is where they part ways, and it’s worth being clear about so you don’t follow the wrong instructions. The true prayer plant, Maranta, grows on trailing stems with spaced nodes, which is exactly why stem cuttings work so well. Most calatheas, by contrast, grow in a clumping rosette with no trailing stem to cut, so they’re propagated almost entirely by division rather than cuttings. If a guide tells you to take a stem cutting from a calathea, it’s likely mixing up the two genera. When in doubt, look at the plant: if it trails and has obvious nodes along a stem, cuttings are on the table; if it’s a tight clump of leaves rising from the soil, division is your route.
Common problems and quick fixes
Most propagation setbacks trace back to the same handful of causes. Here’s how to read them.
The cutting has no node. This is the classic beginner miss. A piece of bare internode with a leaf attached has nowhere to grow roots and will simply sit, then rot. Recut so every piece includes a node.
The stem turns mushy or slimy in water. That’s rot, usually from submerged leaves fouling the water or from water left too long. Trim back to firm tissue, strip any leaf that sits at or below the waterline, and refresh the water more often.
Leaves crisp or curl while rooting. The cutting is losing more moisture than it can replace without roots. Raise the humidity with a clear cover or bag and keep it out of direct sun and drafts.
Roots formed but the cutting struggles after potting. This is transplant shock, most common when moving a long water-root system into soil. Pot up sooner, while water roots are short, keep humidity high for a week or two after potting, and keep the soil evenly moist while the plant adjusts.
Nothing is happening after several weeks. Cool temperatures and low humidity slow everything down. Move the setup somewhere warmer and brighter (still indirect), make sure the humidity cover is doing its job, and give it more time; six weeks isn’t unusual in less-than-ideal conditions.
Want to practice on something tougher first?
Prayer plants are fairly forgiving, but if you’re brand new to making more plants and want to build confidence on something nearly unkillable, a snake plant is a great starting point. The method is different (snake plants propagate from leaf sections or by division rather than nodal stem cuttings), so it’s a useful contrast that teaches the general rhythm of rooting. Here’s our full walkthrough on how to propagate a snake plant.
The bottom line: to propagate a prayer plant, either snip a stem just below a node and root it in water or moist soil under a humid cover, or split a crowded rootball into clumps when you repot. Give the new plants warmth, steady moisture, and bright indirect light, and in a few weeks you’ll have more prayer plants than you started with, at no cost beyond a little patience.